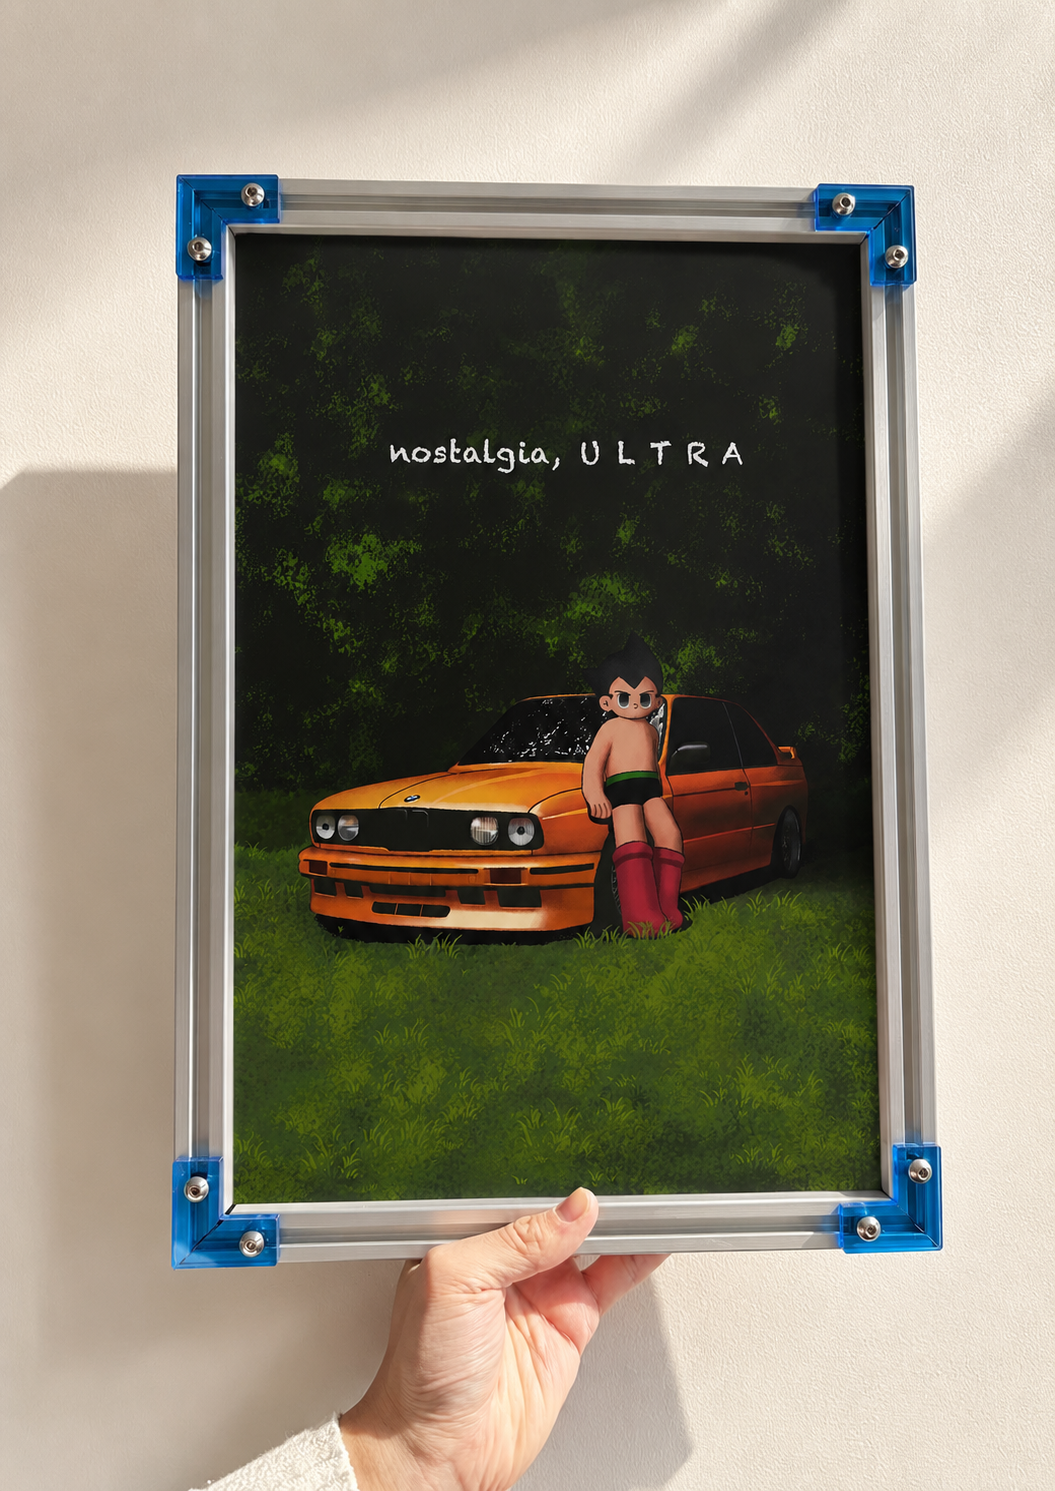

Your music poster looks right on the wall, but the phone photo looks tilted, washed out, or full of reflections. Before changing the room or adding a filter, check three things: the light, the position of your phone, and what sits around the artwork. Small adjustments can make the photograph easier to read without changing the print itself.
This guide uses the Childish Gambino Astro Boy poster from lxzart as an example. Its black-and-white composition is a useful subject for noticing lost shadow detail and bright reflections. The aim is a clear photograph of your own display, not a digitally reinvented version of the design.
Know what you are photographing
The featured design is Childish Gambino-inspired wall art with Astro Boy elements. The product page describes a premium non-woven fabric poster print with a smooth texture and water-resistant material. It is sold unframed; the frame is not included. Any frame shown in the product image is a display example, not an included accessory.

If you have added a frame with glass or acrylic, remember that the reflective surface is part of your display. A reflection does not necessarily come from the print. Start by observing where the bright patch appears as you move, rather than assuming the artwork needs cleaning or editing.
Choose one clear lighting setup
Try soft daylight from a nearby window when direct sun is not falling across the poster. Look for reasonably even illumination from top to bottom. A bright stripe across one half and deep shade across the other make it harder to show the full composition in one shot.
Turn off colored decorative lights for your first photograph. If a warm lamp makes one side yellow while daylight makes the other side cooler, switch the lamp off and compare. You can take a second atmospheric room photo later; begin with an uncomplicated view of the artwork.
Move the light before changing the artwork
If a lamp creates a visible hotspot, move it farther to the side or turn it off. Avoid pointing your phone flash directly at a glazed frame. Check for reflections of the window, your clothes, and the phone itself. Moving a distracting bright object out of the reflected area may help without touching the poster.
Do not remove a securely mounted frame just to chase a photograph. Work from a safe standing position, and never balance on furniture to reach a camera angle.
Keep the phone square to the poster
For a straight-on image, place the phone lens approximately opposite the center of the artwork. Keep the phone upright and its back parallel to the wall. If you tilt the phone upward from below, the top of the poster can look narrower than the bottom.
Use your camera's grid, if available, to compare the poster edges with straight reference lines. Step back enough to include the entire print and a little surrounding wall. For the first attempt, use the main camera rather than an ultra-wide view; inspect the edges before deciding whether you need a wider shot.
Check the rectangle, not just the subject
With the featured Astro Boy design, it is easy to concentrate on the character and miss a sloping frame edge. Review all four corners. If one corner appears stretched or the sides converge, adjust your position and retake the picture before relying on perspective corrections.
Protect detail in the dark areas
Clean the phone lens with a suitable lens cloth, hold the phone steadily, and tap on the artwork to focus if your camera supports it. Inspect the character's face and the darker car area in the preview. Both should remain distinguishable rather than merging into a flat patch.
Take a few versions with slightly different exposure settings if your phone allows adjustment. Compare them at a larger viewing size. Do not brighten the image so much that pale details disappear, or deepen the blacks until the background loses its visible structure. Choose the version that best resembles the print in front of you.
Capture three useful views
You do not need dozens of nearly identical photos. Give each image a purpose, and leave enough space around the edges to make small crops later.
- The complete artwork: a straight-on view showing every edge, with no objects covering the design.
- The room context: a wider view including a desk, chair, or shelf so the display has a recognizable setting.
- The detail: a closer view of an interesting part of the design, clearly presented as a detail rather than the entire poster.
Keep personal documents, addresses, and private screens out of the room photograph. Check reflective surfaces too. A quick look at the background is easier than discovering an unwanted detail after sharing the image.
Show scale honestly
A tight crop can make a small print look much larger than it is. If you are sharing your setup to help someone choose a size, include one contextual view and state the size you actually own. Do not estimate dimensions from a product display image.
The featured poster lists these options:
- 20×30 cm / 8×12 in
- 30×40 cm / 12×16 in
- 40×60 cm / 16×24 in
- 50×70 cm / 20×28 in
Use the lxzart poster size guide to compare dimensions before ordering. For your photo caption, distinguish the print size from the overall size of any frame or mat you added.
Edit lightly and keep the design intact
Start with a small crop and gentle straightening. If the wall looks noticeably warmer or cooler than it does in person, adjust the color balance cautiously. Compare the edited version with the physical display under the same light, rather than with a heavily filtered inspiration image.
Avoid stretching the poster, replacing parts of the illustration, or using strong contrast to hide lost detail. Keep an unedited copy. If a reflection covers an important part of the artwork, changing the lighting and retaking the photograph is a better starting point than trying to reconstruct the missing image.
Frequently asked questions
Do I need a separate camera?
No. Start with the phone you already have. Even light, steady positioning, and careful framing are useful first steps before considering extra equipment.
Why does my black-and-white poster look yellow?
A warm light source or the camera's color balance may be affecting the photograph. Compare a shot with decorative lamps switched off before changing the print or applying a filter.
Is the frame in the featured image included?
No. The Childish Gambino Astro Boy poster is unframed, and the frame is not included. The photograph shows a display example.
Should I use flash to make the details clearer?
Try steady, even lighting first. Direct flash can create distracting reflections on frame glazing. Review the photo closely and adjust the lighting instead of assuming a brighter flash will help.
Find a design worth putting in the picture
A useful poster photograph shows the artwork clearly and gives an honest sense of its place in your room. Start with one straight-on shot, then add context and a detail. Explore the Astro Boy-Inspired Music Icons Collection at lxzart to compare related designs for your own display.